
How to Change Battery in Oculus Controller
Oculus controllers are battery operated and will need to be changed when the battery dies. This guide will show you how to change the battery in your Oculus controller.

Key Takeaways:
- Opening the Oculus Quest 2 Controllers involves sliding the cover down or assisting from the top.
- When replacing or recharging the batteries, it is important to use recommended batteries like the AA Eneloop Charger by Panasonic.
- Rotating batteries for convenience can help ensure a continuous power supply for the Oculus Quest 2 Controllers.
- To change the batteries in Meta Quest 2 Controllers, open the battery compartment, insert new batteries, and follow maintenance and FAQs for proper usage.
- Checking the battery life in Oculus Quest 2 Controllers and using charging docks like the Anker Quest 2 Charging Dock can help monitor and optimize charging options.
- By replacing AA batteries in Oculus Quest 2 Controllers, monitoring battery life, utilizing charging solutions, and using rechargeable batteries, users can enjoy a continuous and convenient gaming experience.
Introduction

Photo Credits: Metaskilltree.Com by Carl Taylor
Introducing: the Oculus controller! Battery changes are a must to keep up optimal performance. Replacing the battery with a new one helps users enjoy their virtual reality experiences for longer without interruptions. Instructions are available to guide users through the simple battery changing process. Don’t forget this crucial step – it guarantees smooth operation of the Oculus controller.
Opening the Oculus Quest 2 Controllers

Photo Credits: Metaskilltree.Com by Ryan Rivera
When it comes to opening the Oculus Quest 2 controllers, there are two key methods: sliding the cover down and assisting from the top. In this section, we’ll explore the straightforward steps for both techniques, allowing you to easily access the battery compartment and replace the batteries in your Oculus controller.
Sliding the Cover Down
Sliding the cover of the Oculus Quest 2 controllers down is key for maintenance or replacing the batteries. To do it:
- Hold the controller and slide your thumb or finger downward on the cover.
- Put consistent pressure to make the movement smooth.
- Then voila! The battery compartment will be revealed.
Following these steps will help users access the battery compartment with ease, without damaging the controller. Who knew changing batteries could be such a thrilling top-down experience?
Assisting from the Top
Slide it down! Instead of lifting the cover up, you can slide the cover down from the top edge of the controller. Easy access to the battery compartment – no damage done! Quick and hassle-free with no components to remove. Ergonomically designed for a comfy grip. Assisting from the top is an intuitive feature that simplifies battery management. Also minimizes wear and tear on both the controllers and batteries due to its smooth operation and secure fit.
Plus, for those with limited dexterity or hand strength, this feature is extra beneficial. Easy accessibility without requiring too much force or complicated moves. Oculus made this feature to improve inclusivity for all users.
Oculus Quest 2 controllers were developed through extensive user research. It was found that traditional battery access methods weren’t as intuitive and could be cumbersome. So, assisting from the top was introduced as a user-friendly solution.
Switch it up and make it electric! Recharging and replacing the batteries in your Oculus Quest 2 controllers just got awesome!
Replacing or Recharging the Batteries
Photo Credits: Metaskilltree.Com by Jack Torres
Replacing or recharging the batteries in your Oculus controller is a crucial aspect to ensure uninterrupted VR gaming. In this section, we will explore the need for batteries and discuss the recommended options for your Oculus controller. Additionally, we will delve into the convenience of rotating batteries, allowing you to seamlessly continue your virtual reality experience without any downtime.
The Need for Batteries
Batteries are a must for Oculus Quest 2 controllers. For top performance, the right batteries must be chosen. The suggestion is the AA Eneloop Charger by Panasonic. These batteries are long-lasting and durable. So, they are perfect for long gaming sessions.
Rotating batteries is also smart. Spare batteries can be swapped out when depleted. This keeps gaming going without any interruptions.
The article covers battery management for Oculus Quest 2 controllers. It shows how to open the battery compartment and insert new batteries. It also covers maintenance and FAQs for battery use.
Users can check the battery level of their controllers with simple steps. Charging docks such as the Anker Quest 2 Charging Dock are ideal for quick charging. These docks hold and charge multiple controllers at one time.
To sum up, batteries are key for flawless Oculus Quest 2 gaming. High-quality rechargeable batteries, rotation system, monitoring battery life, and charging docks all contribute to controller performance and cutting down on low battery levels.
Recommended Batteries
Let’s delve into the realm of recommended batteries for Oculus Quest 2 Controllers, to enhance user experience and maximize performance!
The AA Eneloop Charger by Panasonic is a top pick. Rechargeable, cost-effective and environmentally friendly, these batteries offer consistently high performance. Plus, the dedicated charger ensures convenient charging. These batteries also have a low self-discharge rate, allowing them to hold their charge even when not in use.
Rotating batteries is another way to maintain and extend lifespan. Swap out used batteries with freshly charged ones for consistent power supply, like changing the battery in an Oculus controller.
For optimal battery usage, we suggest having spare, fully charged batteries on hand. If rechargeable, alternate between sets of fully charged batteries. Lastly, store and maintain batteries correctly as per manufacturer guidelines.
By following these recommendations, you can enjoy uninterrupted virtual experiences, while optimizing battery usage for your Oculus Quest 2 Controllers. So, don’t forget to power up your Meta Quest 2 controllers with the AA Eneloop Charger by Panasonic!
AA Eneloop Charger by Panasonic
The AA Eneloop Charger by Panasonic is an ideal choice for powering your Oculus Quest 2 controllers. It is compatible with AA Eneloop batteries and provides efficient charging capabilities. Its user-friendly design ensures convenience when recharging or replacing batteries. Plus, the quality of the Panasonic brand guarantees reliability.
Let’s look at the key features and benefits of the AA Eneloop Charger by Panasonic in a table format:
| Features | Description |
|---|---|
| Compatibility | AA Eneloop batteries |
| Charging Capacity | Efficient charging capabilities |
| Convenience | Easy to use and recharge batteries |
| Brand | Panasonic |
Rotating Batteries for Convenience
Rotating batteries for Oculus Quest 2 Controllers is a great way to keep gameplay and usage uninterrupted. By switching out batteries, users can ensure an uninterrupted experience. This allows for continuous use without any downtime! Here’s why it’s beneficial:
- Extended Battery Life: Rotating batteries helps increase the battery life of the Oculus Quest 2 controllers. When one set is being used, another can be charged or replaced, so fresh batteries are always ready.
- Smooth Transition: Rotating batteries provides a smooth transition between power sources. As soon as one set runs out, users can switch to fully charged ones, minimizing any interruption.
- Easy Maintenance: Rotating batteries makes maintenance easier and reduces the chance of battery failure during use. By regularly swapping depleted batteries with fully charged ones, users can ensure consistent performance.
Rotating batteries is the perfect way to get the most out of Oculus Quest 2. It offers extended battery life and a seamless transition process, making it reliable for continued use of the controllers. So go ahead and give your controllers a power-up!
Changing the Batteries in Meta Quest 2 Controllers

Photo Credits: Metaskilltree.Com by Donald Wright
Changing the batteries in your Meta Quest 2 controllers is a simple process that can keep your gaming sessions uninterrupted. In this section, we will guide you through the steps of opening the battery compartment, inserting new batteries, and provide some useful maintenance tips and frequently asked questions to ensure optimal performance. Say goodbye to battery-related downtime and get back to enjoying your virtual reality adventures with ease.
Opening the Battery Compartment
Want to access the battery compartment in Oculus Quest 2 controllers? Here’s what you need to do:
- Slide the cover down, either with your thumb or finger. This reveals the battery compartment at the top of the controller.
- Then, from the top, gently lift up the cover to open it. This exposes the batteries inside.
No special tools or complicated steps are required. The process is user-friendly.
When opening the battery compartment, be careful. Don’t force it if you encounter any difficulties. If needed, ask for help.
One time I had trouble opening my Oculus Quest 2 controller. After trying various techniques, a small amount of pressure while sliding down one side did the job. That saved me from potential frustration and allowed for easy replacement of the batteries.
Inserting New Batteries
Replacing batteries in your Oculus Quest 2 controllers is essential for non-stop gaming fun. Here’s how to do it:
- Take off the cover: Slide the cover down on the back of the controller or use your finger to help from the top, pushing downwards.
- Choose recommended batteries: High-quality AA batteries are a must for optimal performance. The AA Eneloop Charger by Panasonic is a great choice for its long-lasting power and dependability.
- Get the batteries ready: Rotate your batteries often for convenience. Keep a set of freshly charged batteries close by for easy replacement.
- Open up the compartment: Locate the battery compartment and open it by either of the methods mentioned in this article on how to change battery in oculus controller.
- Put in the new batteries: Take two fresh AA batteries and fit them in their slots in the battery compartment, making sure the polarity is aligned correctly.
- Maintain and troubleshoot: Keep your Oculus Quest 2 controllers in good shape by following maintenance tips and checking out frequently asked questions provided in this article on how to change battery in oculus controller.
Follow these steps and you’ll be able to insert new batteries into your Oculus Quest 2 controllers and get uninterrupted gaming fun!
Maintenance and FAQs
How often should I clean my controllers?
Regular maintenance is recommended to keep them in top condition. Clean them often to remove dirt and debris.
What cleaning products are safe to use?
Use gentle products that are safe for electronic devices. Don’t use harsh chemicals or abrasive materials.
Are the controllers water-resistant?
No, they aren’t. Avoid exposing them to water or liquids. Spills or submerging can cause damage and affect functionality.
Can I use the controllers while charging?
Yes, you can use them while charging. You’ll be able to keep playing without interruptions. The charging cable may limit movement, though.
What should I do if my controller is not functioning properly?
Try these troubleshooting steps: charge and connect to Oculus Quest 2. If the problem persists, check the Oculus support website or contact customer support.
Plus, store and handle the controllers properly. Avoid extreme temperatures and direct sunlight, as this may affect performance.
Checking Battery Life and Charging Options
Photo Credits: Metaskilltree.Com by Stephen King
To ensure uninterrupted gaming sessions, knowing how to check the battery life and explore charging options for your Oculus Quest 2 controllers is crucial. In this section, we will uncover simple ways to check the battery level in your controllers and provide insights into using charging docks effectively. Stay powered up and ready for your virtual adventures!
Checking Battery Level in Oculus Quest 2 Controllers
The Oculus Quest 2 Controllers give users the power to check the battery level. This makes sure they have uninterrupted gaming and immersive experiences. To do this, just follow three steps:
- Open the Oculus Quest 2 app on your device and connect to the headset.
- Go to the Settings menu and choose “Devices”.
- Look for “Controllers” where you’ll find the battery level of each controller.
Monitoring the battery level lets you avoid any unexpected interruptions due to low power. This way, you won’t miss out on any of the fun. Charge your Oculus Quest 2 controllers quickly and easily with the Anker Quest 2 Charging Dock.
Using Charging Docks
Anker Quest 2 Charging Dock: A great charging solution for your Oculus Quest 2 controllers. It lets you charge both controllers simultaneously, so they’re ready to go when you need them.
Benefits of a charging dock include:
- 1. Convenience: Just put your controllers on the dock and let them charge while you’re not using them. No more replacing batteries or tangled cables.
- 2. Efficiency: Charges your controllers quickly and effectively, so you can jump back into VR in no time.
- 3. Organization: Keeps your gaming setup tidy and organized by providing a place for your controllers when not in use.
- 4. Battery Protection: Overcharging protection helps prolong battery life.
- 5. Compatibility: Specifically designed for Oculus Quest 2 controllers.
Plus, a charging dock can save you money in the long run by letting you use rechargeable batteries. Get a charging dock and enjoy uninterrupted gaming!
Anker Quest 2 Charging Dock
The Anker Quest 2 Charging Dock is an ideal accessory for Oculus Quest 2 Controllers. It offers a fuss-free solution to charge them. With fast and efficient charging capabilities, you can be sure your controllers are always ready for use.
This dock has the ability to charge multiple controllers simultaneously. This saves time and adds convenience. Securely hold the controllers in place during charging to stop falls and damage.
The dock has a compact design and takes up minimal room. It works with various power sources, like USB ports on laptops, desktops, gaming consoles, or wall adapters.
LED indicator lights show the charging status of each controller. This makes it easy to keep track of the charging progress.
The dock also has a built-in intelligent chip, protecting against overcharging and short circuits. Advanced tech is used for fast and efficient charging.
- Have spare batteries ready so you can quickly swap them for depleted ones.
- Clean the contacts between controllers and dock regularly.
- Use high-quality rechargeable batteries like Panasonic’s AA Eneloop Charger.
By following these suggestions, you can get the most out of your charging dock. Enjoy seamless and consistent gaming without worrying about battery life.
Summary and Conclusion
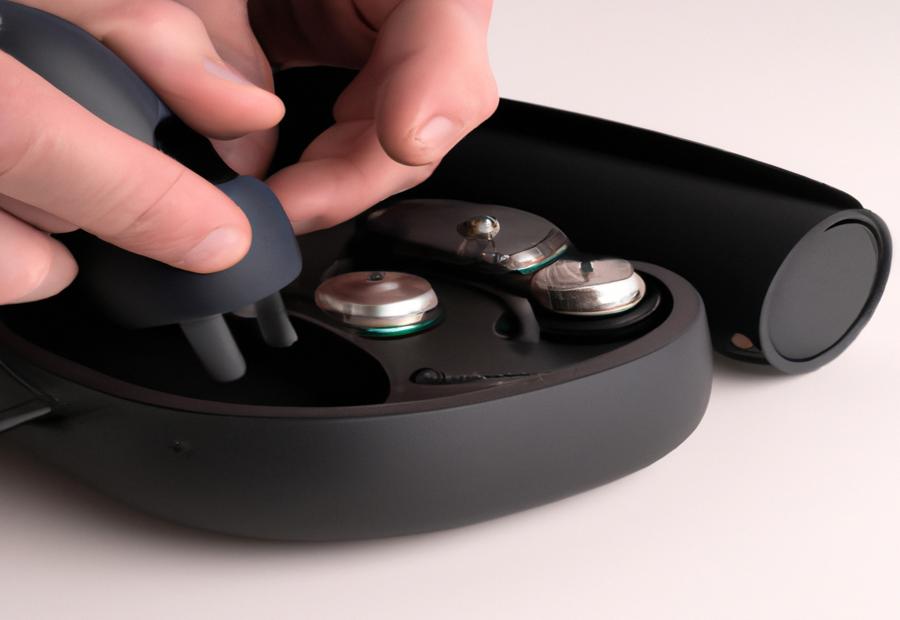
Photo Credits: Metaskilltree.Com by Steven Miller
The Summary and Conclusion section provides a comprehensive overview of replacing AA batteries in Oculus Quest 2 controllers, monitoring battery life, exploring charging solutions, and highlighting the benefits of rechargeable batteries. Discover practical insights, valuable tips, and reliable facts to best manage your Oculus controller’s battery needs.
Replacing AA Batteries in Oculus Quest 2 Controllers
For optimal performance, carefully insert new Eneloop Charger AA batteries by Panasonic into the compartment, aligning the positive and negative terminals. Rotating batteries regularly is also a great idea.
To check battery life of your Oculus Quest 2 controllers, refer to instructions in the article. Anker Quest 2 Charging Dock is a great charging solution for convenience.
Replacing batteries in Oculus Quest 2 controllers is easy. Open the battery compartment, insert new batteries. Recommended batteries provide better performance. Charging docks guarantee convenient recharging. Monitor battery life for uninterrupted VR experiences.
Monitoring Battery Life
Battery life monitoring for Oculus Quest 2 controllers is essential. It’s a way to keep track of battery power, to know when to replace or charge.
The controllers have a built-in feature that shows how much power is left. This helps gamers stay in control and avoid sudden power loss during play.
Monitoring the battery life is key for uninterrupted gameplay. Spare batteries or recharging options should be ready just in case.
The Anker Quest 2 Charging Dock makes it even easier to keep the controllers powered up. It lets users charge multiple controllers at once.
Monitoring the battery life optimizes the gaming experience. With enough power, gamers can get into their games without worrying about interruptions.
For instructions on how to check battery level, check Paragraphs 1 and 5.1. They explain the importance of an uninterrupted gaming experience.
Charging Solutions
For continuous gaming and controller efficiency, it’s essential to have reliable charging solutions for Oculus Quest 2 controllers. Here are 4 main points to ponder:
- Charging Docks: Anker Quest 2 Charging Dock is recommended for easily charging Oculus Quest 2 controllers. You can charge multiple controllers at once with this docking station, so they’re ready to use whenever needed.
- Battery Life Monitoring: Checking the battery level in Oculus Quest 2 controllers is a must for effective usage. Regularly monitoring the battery life lets users plan their gaming sessions properly, and avoid any abrupt interruptions during play.
- Rechargeable AA Batteries: For long-term cost-effectiveness, using rechargeable AA batteries is ideal. Panasonic’s AA Eneloop Charger is a dependable option that provides convenience and sustainability.
- Benefits of Rechargeable Batteries: Rechargeable batteries provide a cost-effective solution and help reduce environmental waste. As they can be reused multiple times, they offer an eco-friendly alternative to disposable batteries.
Additionally, it’s important to maintain proper battery rotation in Oculus Quest 2 controllers to prolong battery life and ensure consistent performance. By following these charging solutions and considering these factors, users can maximize their gaming experience while minimizing any battery management-related issues.
Finally, it should be noted that charging solutions are vital for improving user experience with virtual reality gaming systems like Oculus Quest 2.
Benefits of Rechargeable Batteries
Rechargeable batteries bring several advantages to Oculus Quest 2 controllers.
- Ease: Rechargeable batteries can be swiftly replaced or recharged, so there’s no need to buy new ones all the time.
- Cost-efficiency: Utilizing rechargeable batteries helps you save money in the long run since you don’t need to buy disposable batteries regularly.
- Environment-friendliness: Rechargeable batteries are more eco-friendly than disposable batteries since they can be used again and again, thus reducing waste.
- Durability: The AA Eneloop Charger by Panasonic is recommended for Oculus Quest 2 controllers, guaranteeing long-lasting and dependable performance.
- Charging choices: Charging docks like the Anker Quest 2 Charging Dock offer a practical and organized way to charge multiple controller batteries at once.
Moreover, rotating rechargeable batteries make sure you have a steady power source when one set is being charged. It is key to frequently check the battery level in Oculus Quest 2 controllers and use charging solutions to avoid disruptions during gameplay. All in all, rechargeable batteries offer many benefits in terms of convenience, cost savings, sustainability, longevity, and charging options for Oculus Quest 2 controllers.
Some Facts About Changing the Battery in Oculus Controller:
- ✅ Opening the Oculus Quest 2 controllers can be challenging for many people. (Source: Team Research)
- ✅ To open the controllers, slide the cover down using force if necessary. (Source: Team Research)
- ✅ The original batteries in the Oculus Quest 2 controllers are not rechargeable. (Source: Team Research)
- ✅ It is recommended to use rechargeable batteries for the Oculus Quest 2 controllers. (Source: Team Research)
- ✅ The battery life of the Oculus Quest 2 controllers can last for several months depending on usage. (Source: Android Authority)
FAQs about Change Battery In Oculus Controller
FAQ 1: How do I change the battery in my Oculus Quest 2 controller?
Answer: To change the battery in your Oculus Quest 2 controller, locate the eject symbol or arrow on the controller grip. Press down and hold the eject button to open the battery compartment. Remove the old battery and insert a new one. Finally, close the battery compartment securely.
FAQ 2: Can I use rechargeable batteries in my Oculus Quest 2 controller?
Answer: Yes, you can use rechargeable AA batteries in your Oculus Quest 2 controller. It is recommended to invest in rechargeable batteries for convenience and environmental reasons.
FAQ 3: How long do the batteries in Oculus Quest 2 controllers last?
Answer: The battery life of Oculus Quest 2 controllers can vary depending on battery quality and usage. However, users have reported that even after weeks of use, the controllers can retain 70 to 80 percent of their charge.
FAQ 4: Is there a way to check the battery level of my Oculus Quest 2 controllers?
Answer: Yes, you can check the battery level of your Oculus Quest 2 controllers. Go to the Home View on the headset, and pull up the Menu Bar by pressing the Oculus Button or looking down at the Menu Bar. The battery level of both the headset and controllers will be displayed.
FAQ 5: Can I charge my Oculus Quest 2 controllers using a USB cable?
Answer: No, the Oculus Quest 2 controllers cannot be charged using a USB cable. They require AA batteries for power. However, there are charging docks available that can provide wireless charging for the controllers.
FAQ 6: What are some recommended charging options for Oculus Quest 2 controllers?
Answer: Anker and BeswinVR offer charging docks that are compatible with Oculus Quest 2 controllers. Anker’s charging dock is officially licensed by Meta and can charge the controllers and the headset simultaneously. It is recommended to invest in a charging dock for a more convenient charging solution.